To propagate specific varieties of tropical hibiscus, other than by grafting, rooting cuttings is the usual method. The common varieties found in nurseries and home improvement centers are propagated in this way. More and more of the hybrids are now propagated by rooting cuttings.
Here is an overview: A good idea is to pinch off the very top of the branch two weeks before take the cutting to activate the plant's hormones and speed up the rooting process. Take a one-gallon pot, fill
it with perlite and wet thoroughly. The perlite will need to stay wet. Make your
cuttings about the length of a pencil and cut off all but
one or two leaves at the top (snip away 2/3s of each); cut below an eye (a leaf
node) on a slant; dip this end in Rootone; poke a hole in
the moist perlite with a pencil so as not to wipe off the
hormone and stick in the cutting. (Many growers will nick
some of the bark from the bottom 1" of the cutting.) You can
put many cuttings in one pot as they tend to root better
with company. Keep the cuttings moist and in partial sun.
If fewer cuttings, use a smaller pot -- even a styrofoam coffee cup with drainage holes poked in it.. They should root in about 6 - 8 weeks with temperatures in
the roughly 70-85° F range. (Some varieties will root
without using rooting hormones.)
Or, use oasis cubes.
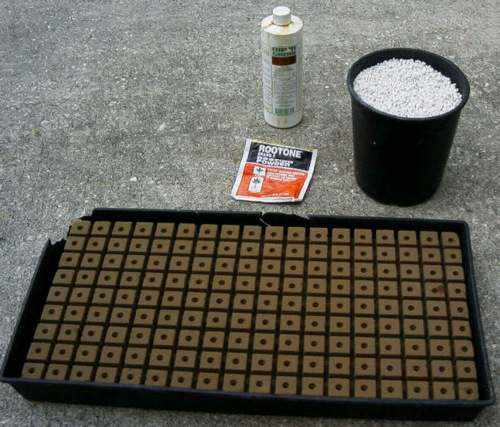
Above are the supplies needed for two different approaches to rooting. A rooting hormone like Rootone or Dip 'N Grow and the rooting medium. The pot at right is full of moist perlite and the cubes at bottom are a sheet of Oasis. Both the pot and the Oasis tray have plenty of drainage holes. Moisten the Oasis before inserting cuttings and follow all directions on these products.

Here, the cuttings have been placed in both media. Usually a grower will only use only one, probably the perlite method since perlite is more readily available than Oasis.
If all goes well, in 6 to 8 weeks these cuttings will have new leaves and have developed root systems. The next step will be to gently remove the cuttings from the pot and separate them before potting in individual pots. Similarly, the Oasis cubes with the rooted cuttings should be carefully separated/broken from the sheet and planted in individual pots. Be very careful with the tender new roots.
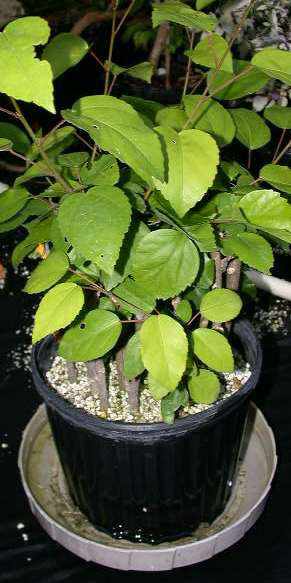
Here's another technique:
A gallon plastic pot with drain holes toward the bottom
of the sides is set in a tray that's deep enough so that
when the tray is full of water, the water level is higher
that the tops of the drain holes. The pot is filled 2/3 full
of perlite and the cuttings are stuck into that. It is then
left in the sun and you occasionally check to make sure that
the tray has enough water in it to cover those drain holes.
The perlite stays damp because it's wicking the water from
the tray -- no muss, no fuss. (Use rooting hormones as
necessary.)
Some other things to keep in mind:
Some varieties, even under optimum conditions, can be very difficult to get to root. Some growers will put plastic bags over their potted cuttings in order to make a little greenhouse, but beware that too much sun will bake your cuttings. The professionals use misting beds to maintain high humidity and 70F degree bottom heat to encourage rooting. If there is plenty of humidity, the cuttings can tolerate more sun.
There are people who are successful rooting non-woody 4-6" top cuttings in water. Be especially careful with these new roots.
Different people do things in different ways and they may be equally successful. see what works best for you.
Also see this Australian page on rooting. And this Swedish page on rooting in water.